
Unveiling the Duchess: A Deep Dive into the Queensbury Crypt Boss Encounter in Mina the Hollower

The sprawling, atmospheric world of Mina the Hollower, a highly anticipated title from Yacht Club Games, promises a rich tapestry of exploration, challenging combat, and enigmatic lore. Among the early trials awaiting players, the Queensbury Crypt boss, known as the Duchess, stands as a significant hurdle. This encounter serves not only as a crucial combat test but also as a subtle tutorial, designed to test a player’s resource management and strategic thinking. This comprehensive guide will dissect the Duchess boss fight, offering detailed preparation strategies, combat breakdowns, and an in-depth analysis of its role within the game’s emerging narrative.
The Duchess: A Corrupted Echo of Nobility
The Queensbury Crypt boss is a chilling manifestation, a grotesque distortion of what was once the Duchess. Players venturing into this somber locale will likely find themselves facing this formidable foe early in their journey, making it their first substantial combat trial. The fight is intentionally crafted to be a lesson in prudence, subtly encouraging players to expend their valuable resources prematurely. Understanding the Duchess’s mechanics and the environment she inhabits is paramount to overcoming this pivotal encounter.
Strategic Preparation: Mastering the Approach to the Duchess
Before stepping into the arena to confront the Duchess, meticulous preparation can significantly tilt the odds in your favor. The game, while challenging, rewards foresight and careful planning.
Securing the Underlab Respawn Point
A critical step in preparing for the Duchess encounter is to establish a convenient respawn point. Players should prioritize unlocking the Underlab respawn point situated near the corridor leading directly to the boss arena. This vital checkpoint is located to the left of the room populated by mummies and is the same area where players can encounter the Duke. Failing to secure this Underlab will force players to rely on the Ancestral Chamber’s entrance respawn point, which, while not excessively distant, introduces an unnecessary layer of inconvenience and potential frustration after a challenging boss defeat.
Unearthing the Mist Jar Sidearm
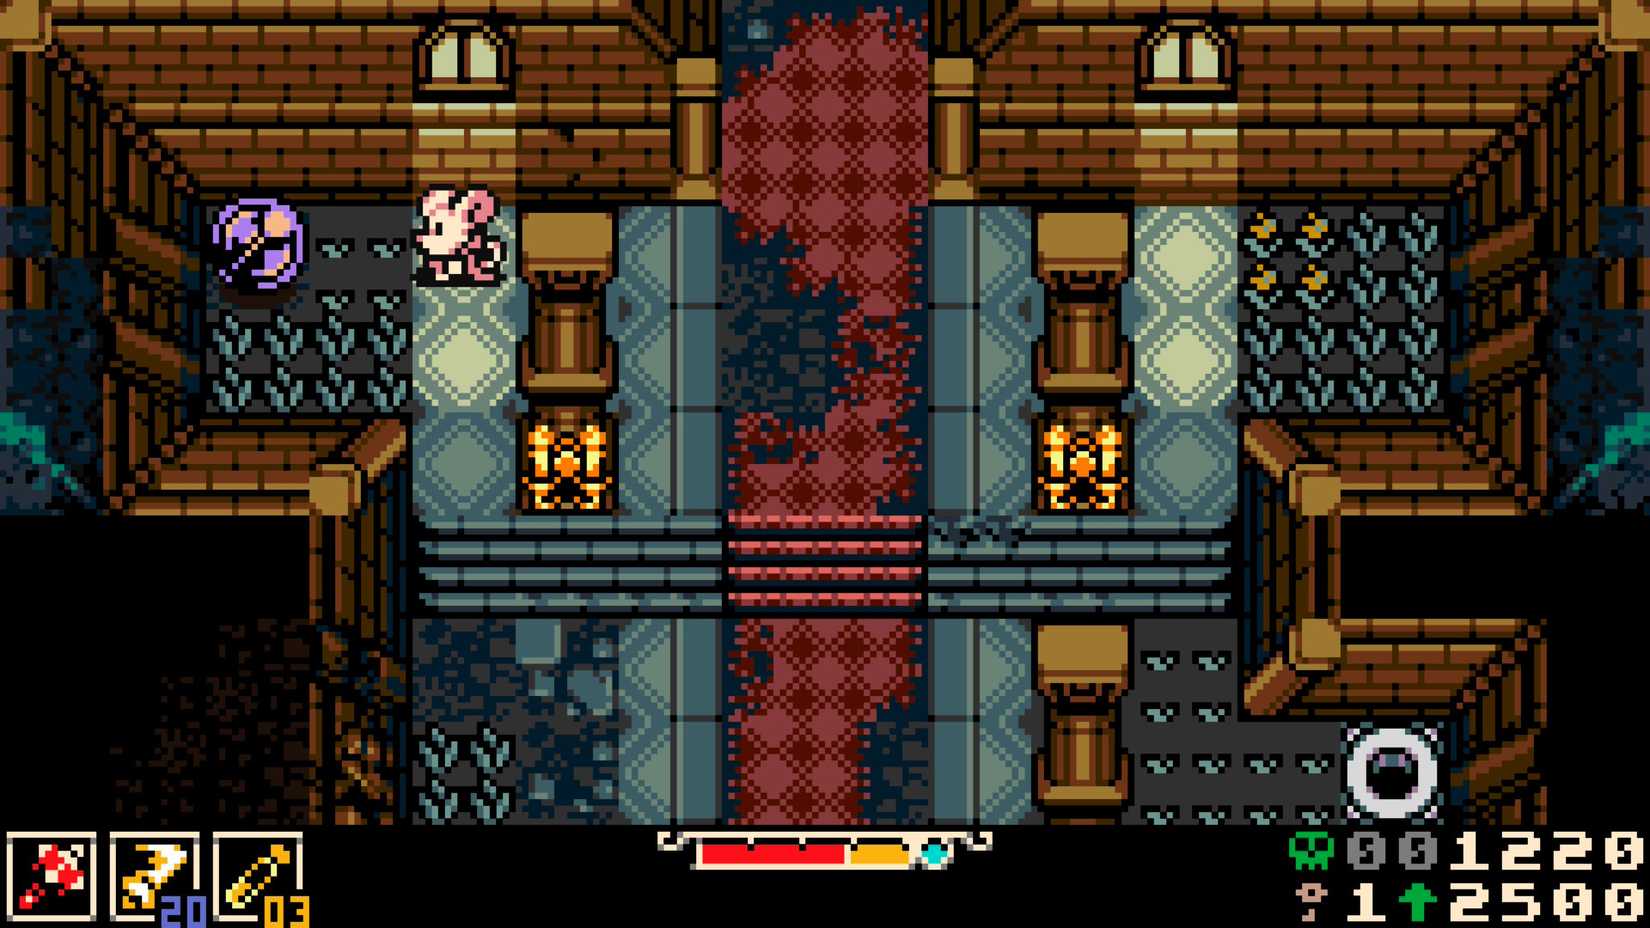
Hidden within the Queensbury Crypt itself lies a crucial tactical advantage. At the upper left section of the corridor that snakes towards the Duchess’s imposing statue, players will discover a cracked gravestone. A few well-placed strikes with Mina’s weapon will shatter this obstacle, revealing a bubble containing a sidearm. It is imperative to note that the available sidearm within this bubble rotates. Therefore, patience is key; players should allow the cycle to complete until their desired weapon materializes.

For the Duchess fight, the Mist Jar sidearm is highly recommended. This particular weapon offers a distinct advantage: it allows Mina to accumulate plasma without needing to land direct hits on the boss. This mechanic is invaluable for learning the Duchess’s attack patterns and timings, as it provides a safe window to replenish plasma reserves for crucial healing or special attacks, all while minimizing the risk of taking damage.
Acquiring the Statue’s Head: The Key to Engagement
To initiate the confrontation with the Duchess, players must first locate and retrieve a key component. Midway through the aforementioned corridor, along the left wall, lies a cracked section of wall. This brittle barrier can be breached to uncover the statue’s head. This head is not merely a collectible; it is an essential item that must be carried and subsequently dropped onto the statue in the adjacent room to commence the boss battle.
Trinket Selection: Maximizing Your Arsenal
While players are likely to have a limited selection of trinkets at this early stage of Mina the Hollower, strategic choices can still offer a tangible benefit. Although the original text does not elaborate on specific trinket recommendations, players should consider equipping items that enhance defensive capabilities, increase damage output, or provide utility for evasion or resource management. Experimentation with available trinkets, based on their individual playstyle and understanding of Mina’s core mechanics, is encouraged.
Deciphering the Duchess: A Two-Phase Combat Breakdown
The Duchess boss fight is a dynamic encounter, meticulously designed with two distinct phases, each presenting unique challenges and demanding a shift in player strategy.
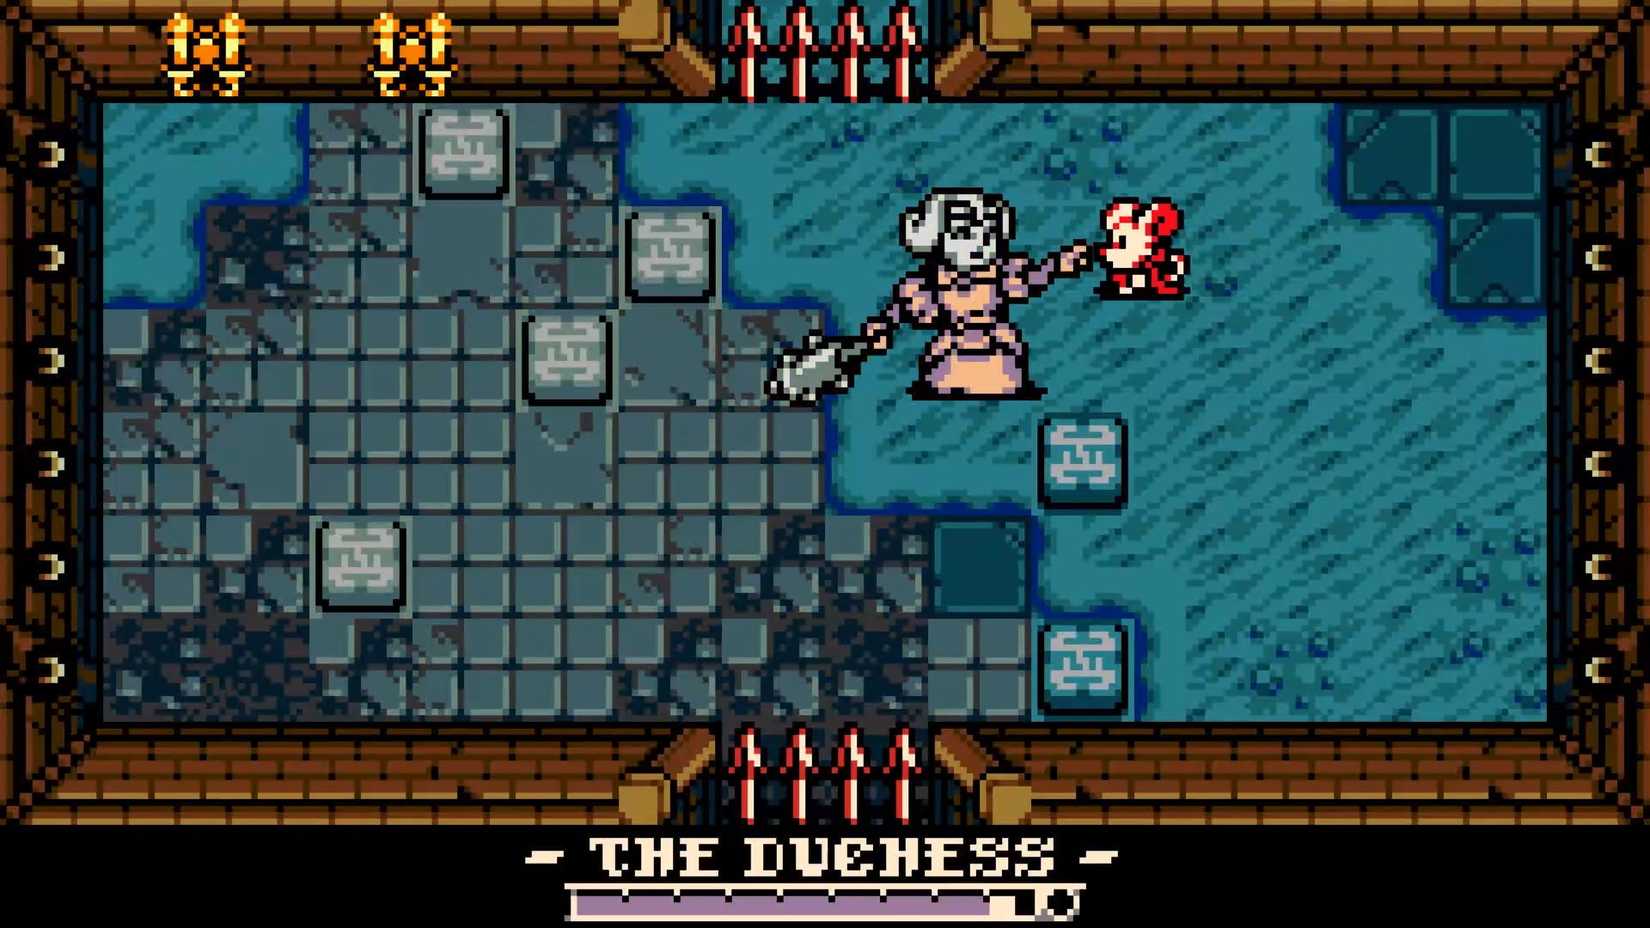
Phase One: The Immobile Menace
In its initial phase, the Duchess assumes the form of a formidable, albeit largely stationary, statue. Her offensive repertoire primarily consists of a devastating jump attack and powerful swings of her mace. While seemingly straightforward, this phase is fraught with environmental hazards that can easily catch an unwary player off guard.
The arena itself is a treacherous chessboard, adorned with pressure panels embedded in the floor. Both Mina and the Duchess, upon stepping on these panels, will trigger a barrage of arrow traps that erupt from the surrounding walls. These arrows are fired at the same vertical level as the activated panel. The key to survival here lies in constant movement. As long as players remain mobile and aware of their surroundings, the arrow traps should pose a manageable threat. However, if evasion becomes impossible, players have several recourse options: they can burrow beneath the projectiles, leap over them, or, with precise timing, shatter the incoming arrows with their weapon.
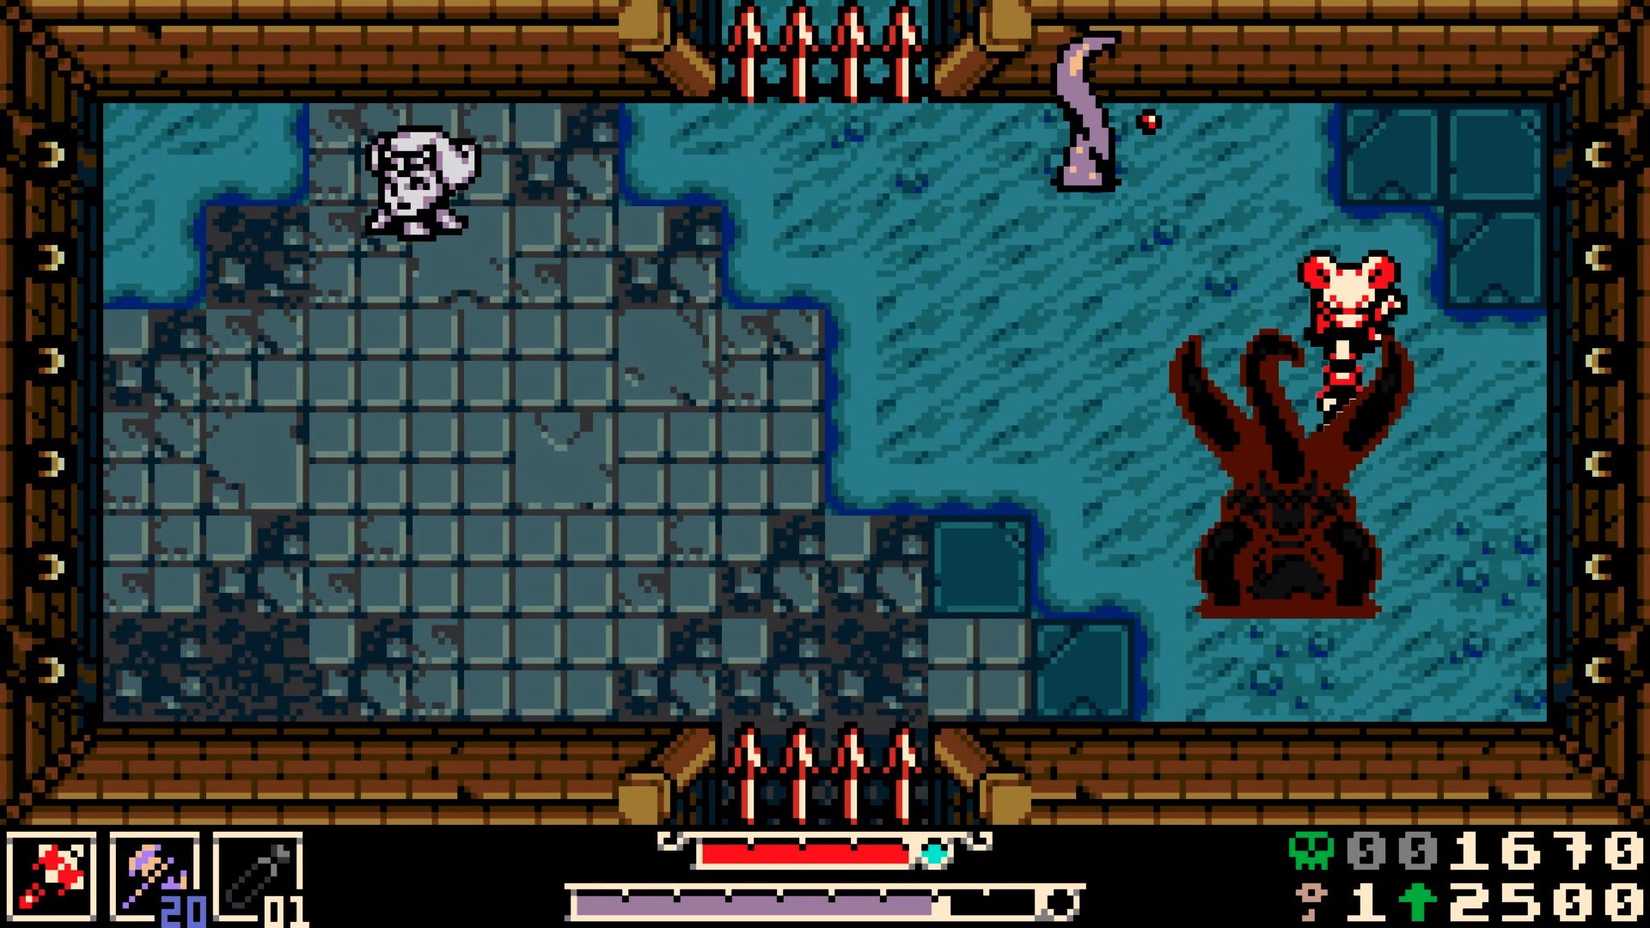
Phase Two: The Unraveling Horror
Upon depleting the Duchess’s health bar, the battle enters a brief interlude as she undergoes a grotesque transformation. This second phase is considerably more challenging, underscoring the importance of conserving resources during the first phase. Players who have judiciously managed their plasma vials, ideally using no more than one during the initial encounter, will find themselves better equipped to handle the escalating difficulty.
The once-imposing statue begins to unravel, sprouting a horrifying mass of writhing tentacles. Adding to the terror, its head detaches and operates independently, moving with an unnerving autonomy. It is crucial to understand that the detached head is invulnerable to any form of attack. Direct attempts to damage it will be futile and represent a wasted opportunity. The primary threat now emanates from the tentacle-infused statue, whose attack patterns undergo a significant and unpredictable alteration.
The environmental hazards of the pressure panels persist into this phase, and their density has increased. The Duchess, in her more erratic and aggressive movements, is far more likely to trigger these traps, compounding the danger for the player. The arena becomes a volatile landscape, demanding heightened situational awareness and agile evasion.
The Duchess’s Arsenal: A Detailed Examination of Attacks
To effectively counter the Duchess, a thorough understanding of her attack patterns is essential. While the provided text offers a general overview, a deeper dive into specific movesets can provide a significant edge.
Phase One Attacks:
- Mace Swing: A straightforward but powerful melee attack. The Duchess will wind up and swing her mace in a wide arc. Players should learn the timing of these swings and either dodge roll through them or maintain a safe distance.
- Jumping Slam: The Duchess will leap into the air and then slam down with considerable force. This attack has a noticeable wind-up, giving players a visual cue to evade. The landing area will also often be indicated by a brief ground effect.
- Pressure Panel Activation: As noted, the Duchess’s movement on pressure panels will trigger arrow traps. Players must be mindful of her positioning and the panels around them.
Phase Two Attacks:
- Tentacle Sweeps: The Duchess’s newly acquired tentacles can perform wide, sweeping attacks. These can cover a significant portion of the arena and require precise dodging or positioning to avoid.
- Tentacle Slams: Individual tentacles can be slammed down onto the arena floor. These attacks are often telegraphed by the tentacle rearing up before striking.
- Head Projectiles (Speculative): While not explicitly detailed, it is plausible that the detached, invulnerable head might also contribute to the offensive. This could manifest as the head launching projectiles or acting as a distraction while the tentacles attack. Players should remain observant of the head’s movements for any emergent attack patterns.
- Enhanced Pressure Panel Exploitation: In this phase, the Duchess’s erratic movements make her a far more potent trigger for the arrow traps. Players must be exceptionally vigilant about her proximity to these panels and their own positioning relative to both the traps and the boss.
Thematic Resonance and Narrative Significance
The Duchess boss fight is more than just a mechanical challenge; it is a narrative anchor within Mina the Hollower. The transformation of the Duchess from a potentially noble figure into a monstrous entity speaks volumes about the corruption and decay that permeates the game’s world. The Queensbury Crypt, a place likely associated with lineage and status, now harbors a grotesque parody of its former glory.
The fight’s design, particularly the emphasis on resource management and the two-phase structure, mirrors the player’s own journey of growth and adaptation. Early in the game, players are still learning the intricacies of Mina’s abilities and the game’s mechanics. The Duchess serves as a stern teacher, forcing players to confront their limitations and develop a more strategic approach to combat. The temptation to overspend resources in the first phase, only to be caught wanting in the more demanding second phase, is a valuable lesson in the long run, reinforcing the importance of measured engagement and foresight.
The Duke’s presence in the vicinity of the Underlab, as mentioned in the preparation section, hints at a deeper connection between these characters and the overarching narrative. The discovery of the Duke near the Duchess’s lair suggests a potential shared history or a common source of their affliction. This interweaving of lore and gameplay mechanics elevates the boss encounter from a simple obstacle to a meaningful piece of the unfolding story.
Broader Implications for Mina the Hollower
The Duchess boss fight offers a glimpse into the core design philosophy of Mina the Hollower. The game appears to be committed to providing challenging, yet fair, combat encounters that reward player skill and strategic thinking. The environmental hazards, combined with the boss’s multifaceted attack patterns, suggest a world that is as dangerous as it is intriguing.
Furthermore, the game’s emphasis on resource management, exemplified by the Mist Jar sidearm’s utility and the plasma vial conservation advice, indicates a gameplay loop that encourages careful planning and execution. Players who master these elements will undoubtedly find greater success and enjoyment as they delve deeper into the mysteries of Mina the Hollower.
The inclusion of hidden pathways, secrets, and optional objectives, such as the cracked gravestone and wall, further reinforces the idea that exploration and keen observation will be richly rewarded. These elements contribute to a sense of discovery and encourage players to engage with the game world on a deeper level.
Conclusion: A Formidable Gauntlet of Growth
The Duchess boss in the Queensbury Crypt of Mina the Hollower is a masterfully crafted encounter that serves as both a significant combat challenge and a pivotal learning experience. By understanding the strategic preparations, the nuances of each phase, and the thematic weight of the battle, players can approach this formidable foe with confidence. The Duchess is not merely an enemy to be defeated, but a testament to the depth and complexity that Mina the Hollower promises to deliver, urging players to hone their skills, manage their resources wisely, and immerse themselves in its darkly enchanting world.


Leave a Comment