Battle of the Coral Sea: The Pivotal Clash That Halted Japan’s Pacific Advance
PORT MORESBY, Papua New Guinea – May 8, 1942 – In a historic engagement that forever changed naval warfare, the Battle of the Coral Sea concluded today, marking the first time in history that opposing aircraft carrier forces fought without their ships ever seeing each other. Fought between May 4 and 8, 1942, this ferocious struggle in the waters off northeastern Australia delivered a crucial strategic victory for the Allies, halting the relentless Japanese expansion across the Pacific and setting the stage for the dramatic turning point that would follow a month later at Midway. While the Japanese inflicted heavier losses in tonnage, the Allied success in repelling the invasion of Port Moresby and severely crippling key Japanese assets proved invaluable.
Main Facts: A Paradigm Shift in Naval Combat
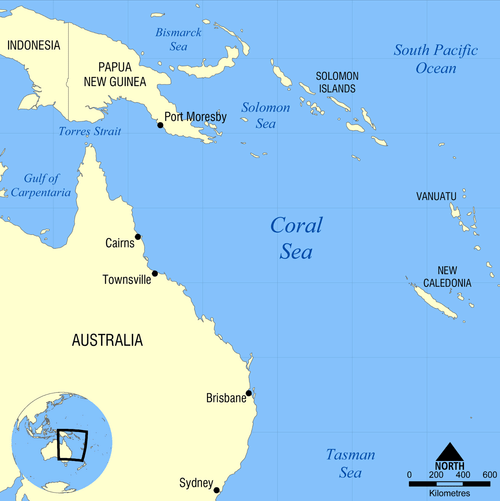
The Battle of the Coral Sea was an unprecedented conflict, primarily contested by the air wings of aircraft carriers, signifying a fundamental shift in naval strategy. The engagement unfolded over five intense days, driven by Japan’s ambition to occupy eastern Papua (including Port Moresby) and the Solomon Islands, thereby threatening Australia and severing crucial Allied supply lines. The United States Navy, determined to prevent further Japanese territorial gains, deployed two of its precious few aircraft carriers to meet the threat.
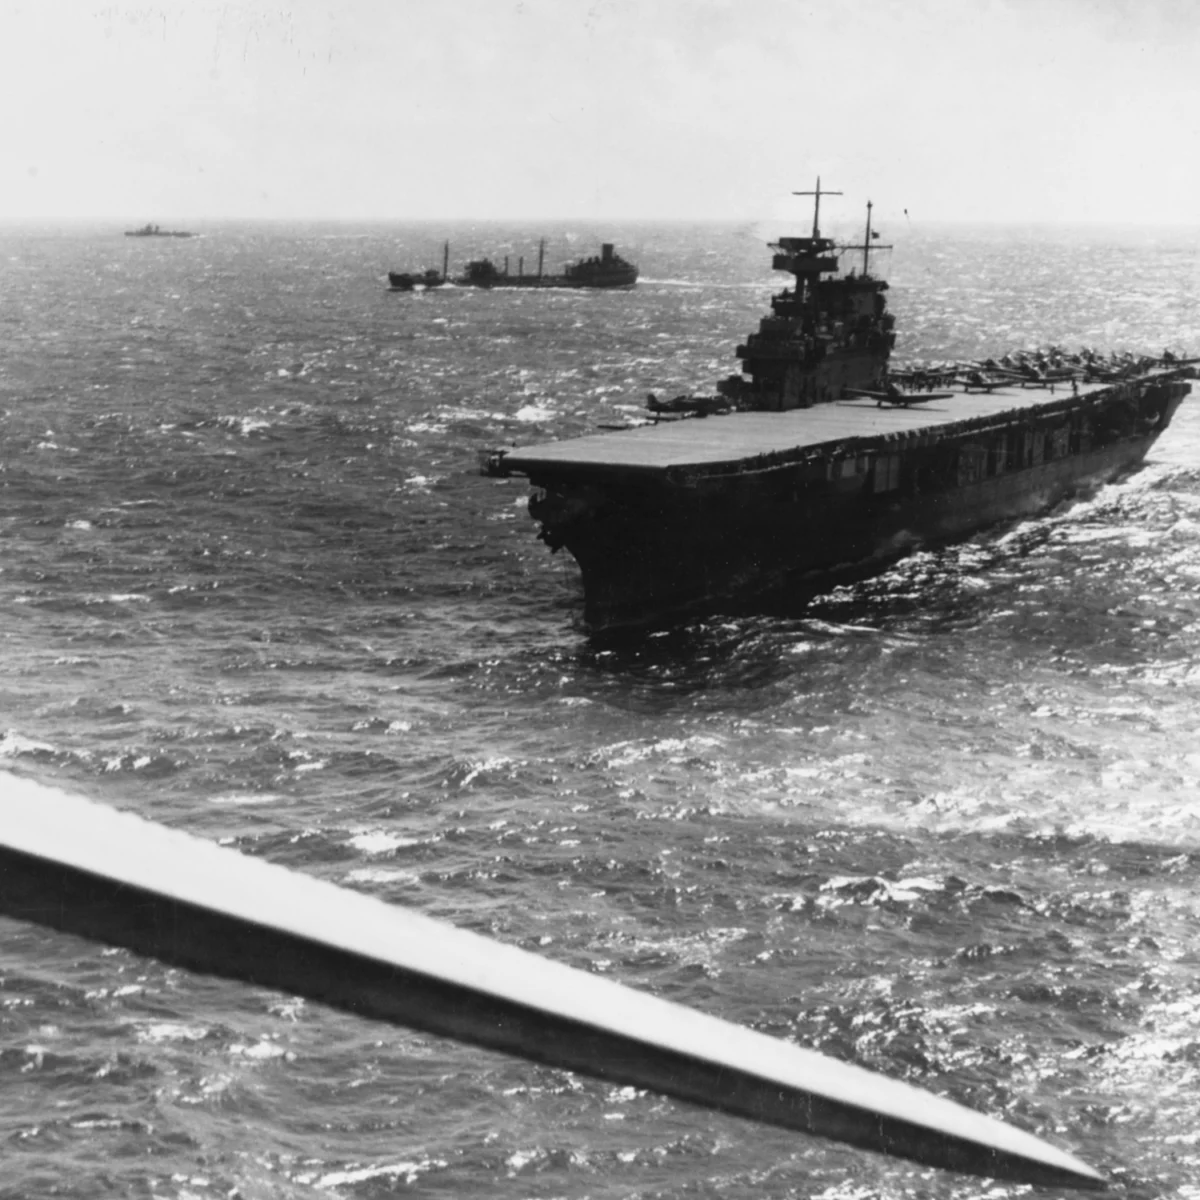
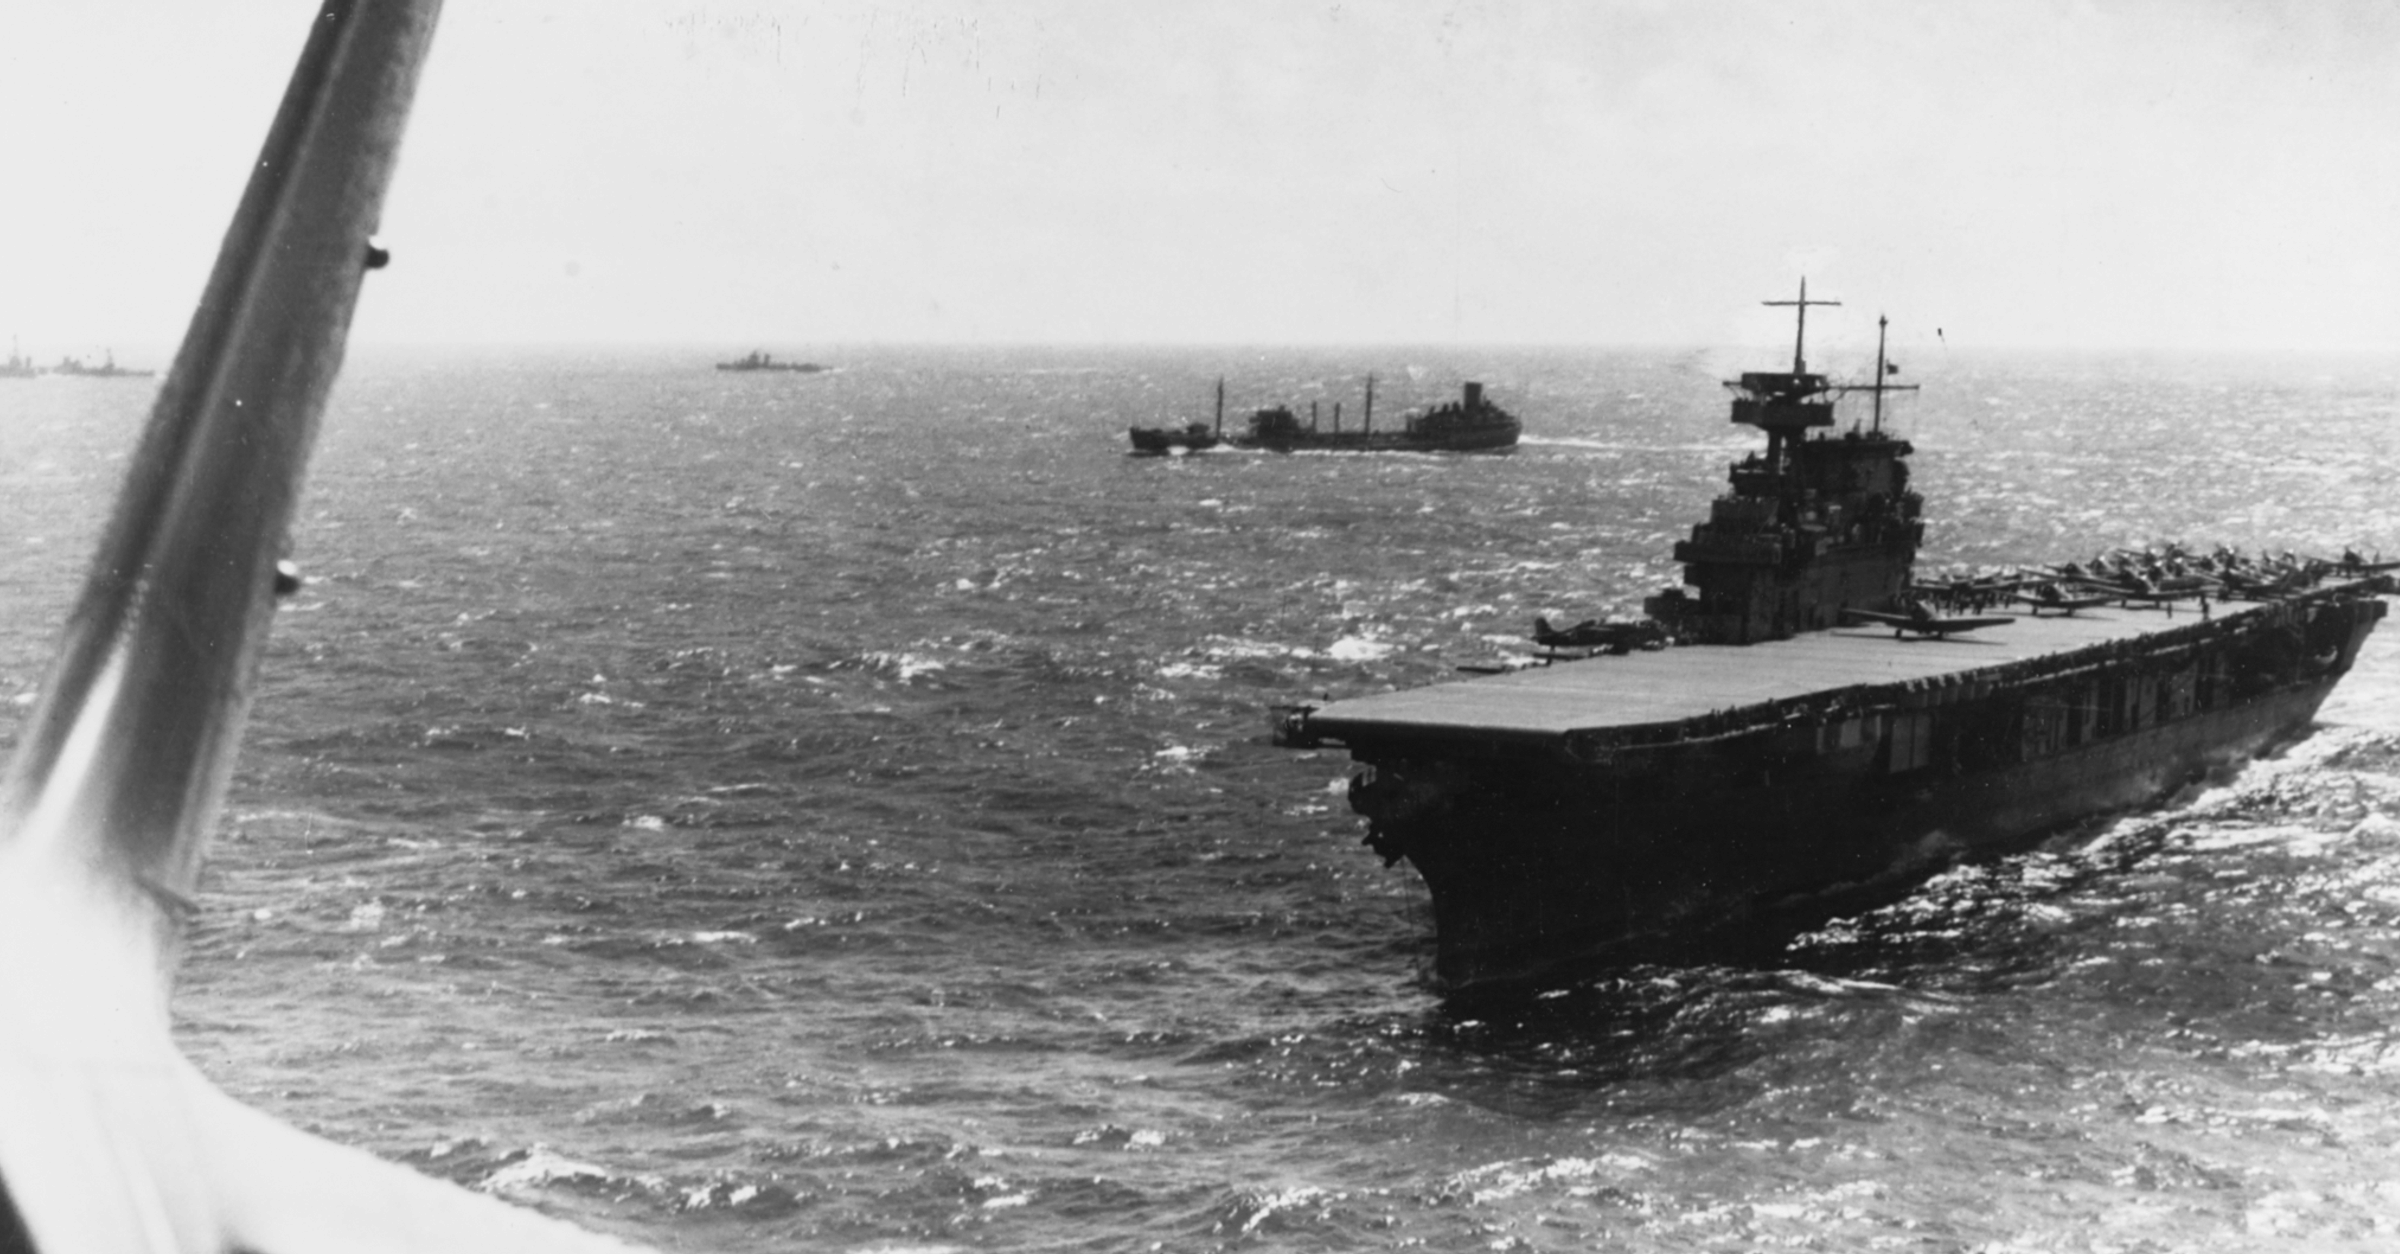
By the battle’s end, the Japanese Imperial Navy had lost the light carrier Shōhō and seen its formidable fleet carrier Shōkaku severely damaged, while its other fleet carrier, Zuikaku, suffered heavy aircraft losses. The U.S. Navy, in turn, mourned the loss of the carrier USS Lexington, one of only four carriers it possessed in the Pacific at the time, and the USS Yorktown sustained significant damage.
Despite the U.S. suffering greater material losses – a tactical victory for Japan in terms of tonnage sunk – the battle was a decisive strategic triumph for the Allies. The Japanese invasion force targeting Port Moresby was compelled to withdraw, marking Japan’s first major operational setback of the war. Critically, the damage sustained by Shōkaku and the depleted air complement of Zuikaku rendered both carriers unable to participate in the upcoming Battle of Midway, an absence that would prove instrumental in the U.S. victory there and ultimately turn the tide of the Pacific War.
Chronology: Unraveling the Imperial Ambition and Allied Response
Pre-Battle Landscape: Japan’s Relentless Imperial March
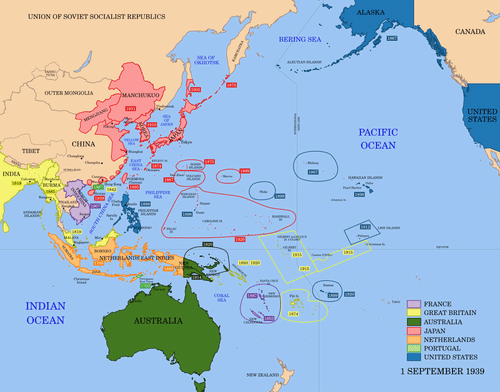
The roots of the Coral Sea conflict lie deep in Japan’s aggressive expansionist policies throughout the 1930s and early 1940s. Driven by a quest for national prestige, new territories, vital resources like oil, and access to new markets, the Japanese military steadily built its empire. By late 1941, Japan controlled Manchuria, Formosa (Taiwan), Korea, significant portions of coastal China, and French Indochina (modern-day Laos, Cambodia, and parts of Thailand).
The infamous attack on Pearl Harbor in December 1941 crippled the U.S. Pacific Fleet, providing Japan with a window of opportunity to accelerate its conquests. Simultaneous attacks on the U.S.-controlled Philippines, and British territories including Malaya, Burma (Myanmar), and Hong Kong, further demonstrated Japan’s audacious strategy. With the Western powers reeling, the Japanese Empire expanded dramatically, capturing Singapore in February 1942 and sweeping through the main islands of the Dutch East Indies (Sumatra, Java, Borneo, Celebes, and New Guinea) by March and April.
The next critical objective in Japan’s "Greater East Asia Co-Prosperity Sphere" strategy was Operation MO, aimed at securing Port Moresby in eastern Papua and the Solomon Islands. Control of these territories would solidify Japan’s defensive perimeter, provide forward airbases for strikes against northern Australia, and, if extended further east to Fiji, Samoa, and New Caledonia, would effectively sever the vital supply lines connecting the United States to Australia and New Zealand. This strategic isolation of Australia was a core Japanese objective, and Port Moresby, with its crucial airstrip, was the linchpin.
Allied Intelligence and Nimitz’s Calculated Risk
Unbeknownst to the Japanese command, Allied intelligence, specifically through the deciphering of Japanese naval codes (known as "MAGIC"), had provided early warnings of Operation MO. As early as April 9, Admiral Chester W. Nimitz, Commander-in-Chief of the U.S. Pacific Fleet, was aware of Japan’s intentions and even the two-pronged nature of their attack.
Nimitz faced a perilous dilemma. With only four fleet carriers in the entire Pacific – USS Lexington, USS Yorktown, USS Hornet, and USS Enterprise – committing two to counter Operation MO was an immense gamble. The Hornet and Enterprise were unavailable, having just returned from the audacious Doolittle Raid on Tokyo in April, requiring resupply and maintenance. Thus, the fate of the Pacific theater, and indeed Australia, rested heavily on the Lexington and Yorktown.
Nimitz swiftly organized two carrier task groups. Rear Admiral Frank Jack Fletcher commanded Task Force 17, centered on the USS Yorktown, escorted by three cruisers and four destroyers. Rear Admiral Aubrey Fitch led Task Force 11, with the USS Lexington as its core, accompanied by two cruisers and five destroyers. A third, multinational force, Task Force 44, commanded by Royal Navy Rear-Admiral John G. Crace, comprised the U.S. cruiser USS Chicago, the Australian cruisers HMAS Australia and HMAS Hobart, and the U.S. destroyer USS Perkins. This surface action group was specifically tasked with defending Port Moresby from a direct amphibious assault. Four U.S. submarines and 12 Catalina flying boats were also deployed for reconnaissance, while the Hornet and Enterprise were ordered to sail for the Coral Sea, albeit knowing they would likely arrive too late for the main engagement.
The Japanese forces, commanded by Vice-Admiral Inoue Shigeyoshi of the 4th Fleet, were even more substantial. Operation MO involved 60 Japanese ships, including three attack groups assembling around Truk Atoll and Rabaul. Rear-Admiral Gotō Aritomo’s force protected the Port Moresby invasion convoy with the light carrier Shōhō, four heavy cruisers, and one destroyer. Spearheading the main strike was Vice-Admiral Takagi Takeo’s force, featuring the two powerful fleet carriers Shōkaku and Zuikaku, two heavy cruisers, and six destroyers. The stage was set for an epic, and unprecedented, confrontation.
The Clash in the Coral Sea (May 3-8, 1942)
May 3: Tulagi’s Early Skirmish
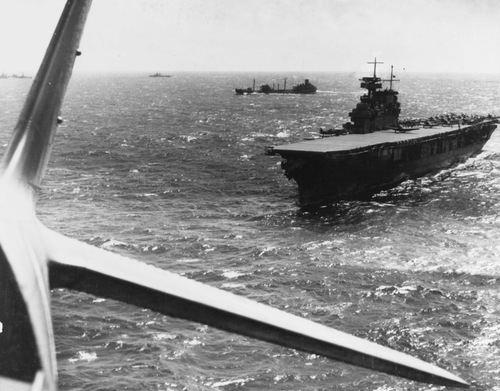
The battle officially commenced on May 3 with the Japanese landings on Tulagi Island and neighboring Gavutu in the Solomons, designed to establish a seaplane base. The landings proceeded without initial resistance, but this calm was short-lived. Just 24 hours later, Rear Admiral Fletcher, commanding the Yorktown group, launched a swift retaliatory strike. His fighters, torpedo-bombers (TBD Devastators), and dive-bombers (SBD Dauntlesses) descended upon the unsuspecting Japanese force. The Japanese ground troops, critically, had not yet received their planned air cover of Mitsubishi A6M Zero fighters due to poor weather, leaving them vulnerable.
The Yorktown‘s aircraft wreaked havoc. One Japanese destroyer, the Kikuzuki, lacking sufficient anti-aircraft defenses, was so severely damaged it had to be beached. Three minesweepers, four landing barges, and five Japanese flying boats were also destroyed. This initial engagement, though small in scale, was a clear signal to the Japanese that their movements were known and their expansion would not go unchallenged.
May 4-6: The Search and Rendezvous
Following the Tulagi strike, poor weather conditions, characterized by low visibility and squalls, hampered both sides’ efforts to locate the main enemy fleets on May 4 and 5. The vastness of the Coral Sea swallowed ships and aircraft alike, turning the initial days into a tense game of hide-and-seek. On May 6, the three separate Allied groups – Fletcher’s carrier groups and Crace’s surface action group – successfully rendezvoused. Fletcher, as the senior officer, assumed overall command, operating under Admiral Nimitz’s clear directive: "Your task assist in checking further advance by the enemy in the above areas [New Guinea-Solomons] by seizing favourable opportunities to destroy ships and aircraft."
May 7: A Day of Costly Errors
May 7 proved to be a day marked by critical misidentifications and devastating attacks. The Allied fleet was divided: Crace’s Task Force 44 was dispatched to intercept the Port Moresby invasion transports, while Fletcher’s carrier forces headed north to confront the Japanese carrier group commanded by Vice-Admiral Takagi. This was to be the first direct clash between opposing carrier forces, fought entirely by aircraft, with the ships themselves remaining out of sight of each other – a revolutionary concept in naval warfare.
Early reconnaissance proved tragically flawed for both sides. U.S. aircraft, acting on incorrect intelligence, mistook a Japanese invasion escort for the main carrier group. Consequently, aircraft from the Yorktown were initially directed against a secondary target. However, the Lexington group soon located the light carrier Shōhō, and Fletcher quickly redirected his aircraft to the new target. The ensuing attack was brutal and swift. Hit by at least 13 bombs (including two direct 1,000-lb hits) and seven torpedoes, the Shōhō sank in minutes, taking 631 of its 834 crew members with it. It was Japan’s first carrier loss of the war.
Meanwhile, the main Japanese carrier force, Shōkaku and Zuikaku, launched its own strike. Due to poor visibility and further intelligence errors, they mistakenly attacked the U.S. destroyer USS Sims and the tanker USS Neosho, which had been sent to the rear of the Allied formation. Both ships were quickly sunk, with heavy loss of life on the Sims and the Neosho left adrift and burning. A subsequent night attack by Japanese aircraft on the Yorktown ended in disaster for the Japanese, with only six of 27 aircraft returning. The day concluded with both sides believing they had achieved more significant victories than they actually had.
May 8: The Carrier Duel
The climactic engagement occurred on May 8. With improved visibility, both main battle groups launched extensive reconnaissance flights and finally located each other. All available aircraft – a total of 122 U.S. planes and 121 Japanese planes – were launched for a decisive attack.
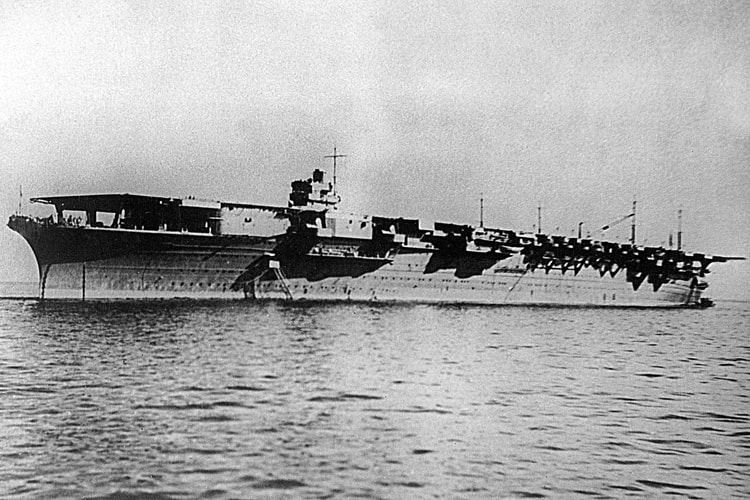
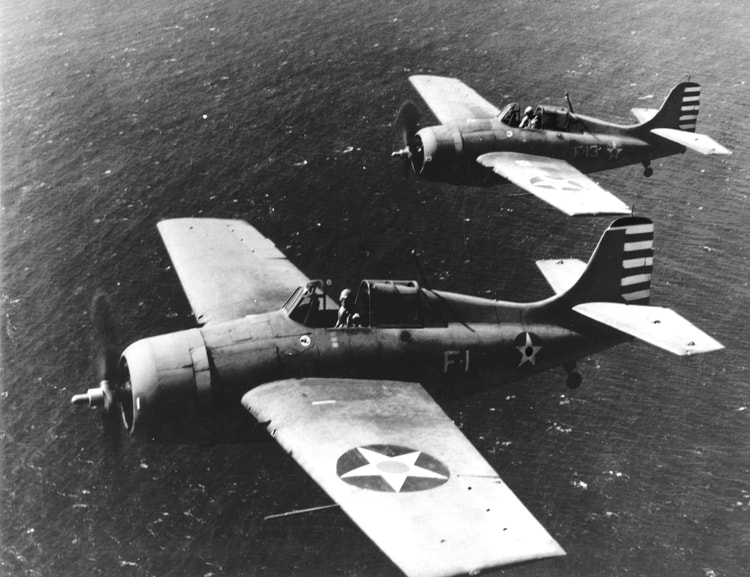
U.S. fighter-bombers (F4F Wildcats) and dive-bombers from both Yorktown and Lexington concentrated their attack on the Japanese fleet carrier Shōkaku. Despite skillful maneuvering by the Japanese captain, who successfully evaded at least 11 torpedoes, the Shōkaku sustained three direct hits from 1,000-lb bombs. The explosions ripped through its flight deck, rendering it inoperable and sparking uncontrollable fires. Unable to launch or recover aircraft, the Shōkaku was forced to withdraw from the battle, escorted by two destroyers. Its air complement was also severely depleted.
In increasingly cloudy weather, U.S. aircraft struggled to locate the Zuikaku, which expertly hid within a local rainstorm, largely escaping damage. However, the Zuikaku‘s air wing, along with planes from the damaged Shōkaku, found their targets: the U.S. carriers. The USS Lexington, a magnificent ship known as "Lady Lex," bore the brunt of the attack. It was hit by two armor-piercing bombs, which, while not immediately crippling, caused personnel casualties and structural damage. More critically, two torpedoes struck its port side. Multiple internal fires ignited, and volatile gasoline fuel vapors leaking from a cracked aviation fuel tank led to sporadic, violent explosions. With the Lexington noticeably down at the bow and fires raging out of control, the decision was made to abandon ship. A U.S. destroyer, the USS Phelps, was ordered to scuttle the carrier with five torpedoes to prevent it from falling into enemy hands. 216 members of her crew were lost.
The USS Yorktown also came under heavy attack. While Japanese bombers were less accurate against her, one 550-lb (250-kg) bomb smashed through four decks before detonating in a storeroom, and another hit amidships. The combined damage forced the Yorktown to reduce speed and withdraw from the battle, seeking urgent repairs at Pearl Harbor.
Believing they had inflicted irreparable damage on both U.S. carriers, the Japanese fighters returned to their ships, which then withdrew north. Despite having dealt a heavier blow to enemy shipping, Vice-Admiral Inoue made the crucial decision to abandon the planned invasion of Port Moresby. The tremendous aircraft losses, coupled with the incapacitation of Shōkaku and the depleted air wing of Zuikaku, meant he could no longer adequately support the amphibious landing or launch another decisive attack against the remaining Yorktown. Fletcher, too, decided to withdraw his force, consolidating the Lexington‘s surviving aircraft onto the Yorktown to maintain air cover for the remaining Allied fleet. Further engagement would have risked the complete loss of his carrier capability.
Supporting Data: A Costly Exchange
The Battle of the Coral Sea was a costly engagement for both sides, particularly in terms of air assets and trained personnel.
Japanese Losses:
- Ships: 1 light carrier (Shōhō), 1 destroyer (Kikuzuki – beached, later sunk), 3 minesweepers, 4 landing barges.
- Aircraft: 77 aircraft destroyed or severely damaged.
- Casualties: 1,074 personnel killed.
- Damage: 1 fleet carrier (Shōkaku) severely damaged, rendered inoperable. Zuikaku largely undamaged but its air wing severely depleted.
Allied (U.S. & Australian) Losses:
- Ships: 1 fleet carrier (USS Lexington), 1 destroyer (USS Sims), 1 fleet oiler (USS Neosho).
- Aircraft: 66 aircraft destroyed.
- Casualties: 543 personnel killed.
- Damage: 1 fleet carrier (USS Yorktown) damaged, requiring extensive repairs.
While the Japanese sank more tonnage (41,800 tons vs. 39,000 tons for the Allies), the strategic implications of their losses far outweighed this tactical advantage. The loss of a carrier, and the severe damage to another, was a blow the Japanese Imperial Navy, with its smaller industrial base, could ill afford.
Official Responses & Command Decisions: A Strategic Rethink
Vice-Admiral Inoue’s decision to abandon the Port Moresby invasion, despite his forces inflicting greater material damage, drew criticism from his superiors. However, his reasoning was sound. The loss of Shōhō and the crippling of Shōkaku, combined with the severe depletion of experienced aircrews across both remaining carriers, meant he lacked the air superiority necessary to protect an amphibious landing. To proceed would have risked an even greater disaster.
On the Allied side, Admiral Fletcher’s withdrawal was also a pragmatic decision. With Lexington sunk and Yorktown damaged, maintaining air superiority was precarious. His priority shifted to preserving the remaining carrier asset, essential for future operations. Nimitz, understanding the broader strategic picture, supported these decisions. The objective of stopping the Port Moresby invasion had been achieved, and the precious carriers, especially Yorktown, needed to be preserved.
Implications: Halting the Tide, Setting the Stage for Midway
The Battle of the Coral Sea was a watershed moment in the Pacific War, carrying profound implications that resonated far beyond the immediate battleground.
A Strategic Victory, Despite Tactical Losses
The battle is universally recognized as an Allied strategic victory, even with the tactical loss of the USS Lexington. The primary Japanese objective – the capture of Port Moresby – was thwarted. This immediate success protected Australia from direct invasion, maintained the vital supply lines between the U.S. and its Australian allies, and delivered Japan its first major operational failure of the war. The psychological impact of this defeat for the previously invincible Imperial Japanese Navy was significant.
The Indispensable Prelude to Midway
Perhaps the most critical implication of the Battle of the Coral Sea was its direct impact on the subsequent Battle of Midway, fought just one month later in June 1942. The damage sustained by the Shōkaku during Coral Sea was so severe that it required months of repairs, making it unavailable for Midway. More crucially, while the Zuikaku was largely undamaged, its air wing had been decimated. The loss of experienced pilots and aircraft meant that Zuikaku was also unable to participate effectively in the Midway campaign.
These two frontline Japanese fleet carriers, instrumental in the Pearl Harbor attack and other early Japanese victories, were thus absent from the most crucial naval battle of the Pacific War. This severely reduced the strike power of the Japanese carrier fleet at Midway, forcing Admiral Yamamoto to deploy only four carriers against the U.S. Navy’s three (including the miraculously repaired Yorktown). The absence of Shōkaku and Zuikaku‘s air groups directly contributed to the U.S. victory at Midway, which saw all four participating Japanese carriers sunk, irrevocably turning the tide of the Pacific War.
The Dawn of Carrier Warfare
Beyond its immediate strategic outcomes, the Battle of the Coral Sea permanently altered naval doctrine. It definitively proved the aircraft carrier’s ascendancy as the dominant capital ship, relegating battleships to a supporting role. The fact that the opposing fleets never visually sighted each other, with all damage inflicted by aircraft launched from afar, heralded a new era of naval combat. The battle underscored the vital importance of naval aviation, intelligence gathering, and damage control in modern warfare.
In conclusion, the Battle of the Coral Sea, while a brutal and costly engagement for both sides, served as a vital check on Japan’s seemingly unstoppable expansion. It was a testament to Allied resolve and strategic foresight, ultimately paving the way for the decisive victories that would lead to Japan’s eventual retreat across the Pacific. Its lessons, particularly regarding the power of carrier aviation and the critical role of intelligence, continue to shape naval strategy to this day.